前言
随着 Spring Cloud Netflix 家族宣布进入维护阶段,我也准备将 spinrg-cloud-in-action 进行相应的调整,计划使用 Spring Cloud Gateway 替代 Zuul,使用 Resilience4j 替换目前使用的 Hystrix ,这篇博客记录下整合 Spring Cloud Gateway 的一些过程。
Spring Cloud Gateway
什么是 Spring Cloud Gateway ?
Spring Cloud Gateway 提供了一个建立在Spring Ecosystem之上的API网关,包括:Spring 5,Spring Boot 2和Project Reactor。 Spring Cloud Gateway旨在提供一种简单而有效的方式来路由到API,并为他们提供横切关注点,例如:安全性,监控/指标和弹性。
为什么要使用 Spring Cloud Gateway ?
首先 Zuul 是基于servlet构建,使用阻塞API。它不支持任何长连接,如 websockets。
Spring Cloud Gateway 基于Spring Framework 5,Project Reactor 和 Spring Boot 2构建,使用非阻塞API。支持Websockets,而且它与 Spring 紧密集成,因此它能给开发人员带来更好的开发体验。
接下来讲介绍如何在项目中引入 Spring Cloud Gateway。
引入Spring Cloud Gateway
首先我们在工程中引入相关依赖(以Maven为例)
1
2
3
4
| <dependency>
<groupId>org.springframework.cloud</groupId>
<artifactId>spring-cloud-starter-gateway</artifactId>
</dependency>
|
不同于Zuul需要在启动类上添加 @EnableZuulProxy,使用spring cloud gateway我们无需通过注解开启网关功能,只需要在网关模块的application.yml中添加如下配置,便可开启通过服务中心自动(根据 serviceId )创建路由。
1
2
3
4
5
6
| spring:
cloud:
gateway:
discovery:
locator:
enabled: true
|
远程调用选用的是 feign ,所以我们需要在 pom 文件中引入 feign 的依赖:
1
2
3
4
| <dependency>
<groupId>org.springframework.cloud</groupId>
<artifactId>spring-cloud-starter-openfeign</artifactId>
</dependency>
|
通过在启动类上添加注解 @EnableFeignClients ,启用feign。关于远程调用这块的使用,和我们使用网关是什么没有关系,还是按照之前的使用方法,如下:
1
2
3
4
5
6
7
| @FeignClient(name = "provider")
public interface HelloControllerRemote {
@PostMapping("/hello")
String hello(@RequestParam("userName") String userName);
}
|
@FeignClient(name = "provider") 指定我们调用哪个微服务模块,通过 @PostMapping("/hello") 等来绑定调用的哪个接口。这样我们就可以在我们的 ConsumerHelloController里面注入该 HelloControllerRemote ,如下:
1
2
3
4
5
6
7
8
9
10
11
12
13
| @RestController
public class ConsumerHelloController {
@Autowired
private HelloControllerRemote helloControllerRemote;
@ApiOperation("hello接口")
@PostMapping("/hello")
public String hello(@ApiParam("用户名") String userName) {
return helloControllerRemote.hello(userName);
}
}
|
验证
1
| curl -X PUT http://localhost:9999/CONSUMER/hello
|
注:我目前使用的是 spring-cloud-gateway-2.1.0.RELEASE ,使用feign调用consumer模块的接口,无法通过/consumer/hello 远程访问,而是调用 /CONSUMER/hello ,模块名需要大写。
整合swagger
因为Spring Cloud Gateway 是基于webflux和Netty,而swagger(version: 2.9.2)目前还没有提供支持,所以我们要用webflux的方式提供swagger对外接口,
1
2
3
4
5
6
7
8
9
10
11
12
13
14
15
16
17
18
19
20
21
22
23
24
25
26
27
28
29
30
| @Component
public class SwaggerRouterFunction {
@Autowired(required = false)
private SecurityConfiguration securityConfiguration;
@Autowired(required = false)
private UiConfiguration uiConfiguration;
@Autowired
private SwaggerResourcesProvider swaggerResources;
@Bean
public RouterFunction<?> routerFunction() {
return RouterFunctions
.route(GET("/swagger-resources"), request -> ServerResponse.ok()
.contentType(MediaType.APPLICATION_JSON_UTF8)
.body(fromObject(swaggerResources.get())))
.andRoute(GET("/swagger-resources/configuration/ui"), request -> ServerResponse.ok()
.contentType(MediaType.APPLICATION_JSON_UTF8)
.body(fromObject(Optional.ofNullable(uiConfiguration)
.orElse(UiConfigurationBuilder.builder().build()))))
.andRoute(GET("/swagger-resources/configuration/security"), request -> ServerResponse.ok()
.contentType(MediaType.APPLICATION_JSON_UTF8)
.body(fromObject(Optional.ofNullable(securityConfiguration)
.orElse(SecurityConfigurationBuilder.builder().build()))));
}
}
|
除此之外,我们还要聚合swagger文档,需要提供 swaggerResource list ,我们是从RouteLocator中获取到routes信息,来实现自动聚合:
1
2
3
4
5
6
7
8
9
10
11
12
13
14
15
16
17
18
19
20
21
22
23
24
25
26
27
28
29
30
31
32
33
34
35
36
37
| @Primary
@Component
public class SwaggerProvider implements SwaggerResourcesProvider {
@Value("${spring.application.name}")
public String applicationName;
private final RouteLocator routeLocator;
public SwaggerProvider(RouteLocator routeLocator) {
this.routeLocator = routeLocator;
}
@Override
public List<SwaggerResource> get() {
List<SwaggerResource> resources = new ArrayList<>();
routeLocator.getRoutes().subscribe(route -> {
String routeUri = route.getUri().getHost();
if (!applicationName.equalsIgnoreCase(routeUri)) {
resources.add(swaggerResource(routeUri, String.format("/%s/v2/api-docs", routeUri)));
}
});
return resources;
}
private SwaggerResource swaggerResource(String name, String location) {
SwaggerResource swaggerResource = new SwaggerResource();
swaggerResource.setSwaggerVersion("2.0");
swaggerResource.setName(name);
swaggerResource.setLocation(location);
return swaggerResource;
}
}
|
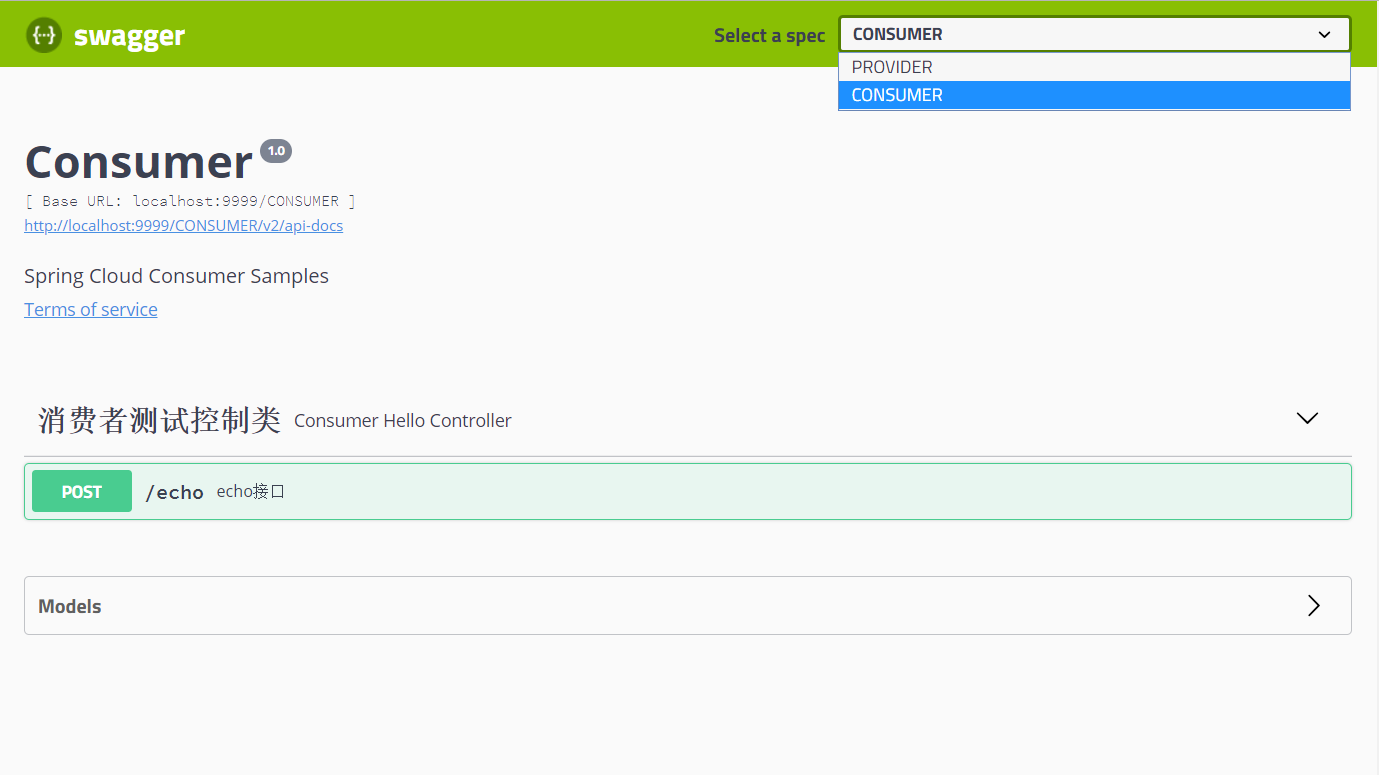
然后我们启动注册中心,网关,provider,consumer 4个模块,访问 http://localhost:9999/swagger-ui.html#/ ,便能看到文档聚合后的效果。
源码
详细代码见 spring-cloud-in-action